Because high dynamic range photography has become a popular technique among car photographers, amateur and professional alike, it is necessary to photograph many small details that vary in the amount of illumination and the surrounding environment. A room or a street, whether the sky is bright or the shadows are deep, demands that you shoot HDR photos.
It is also helpful when creating virtual tours. This technique displays landscapes, environments, and interiors in the greatest detail possible.
1. When To Use HDR
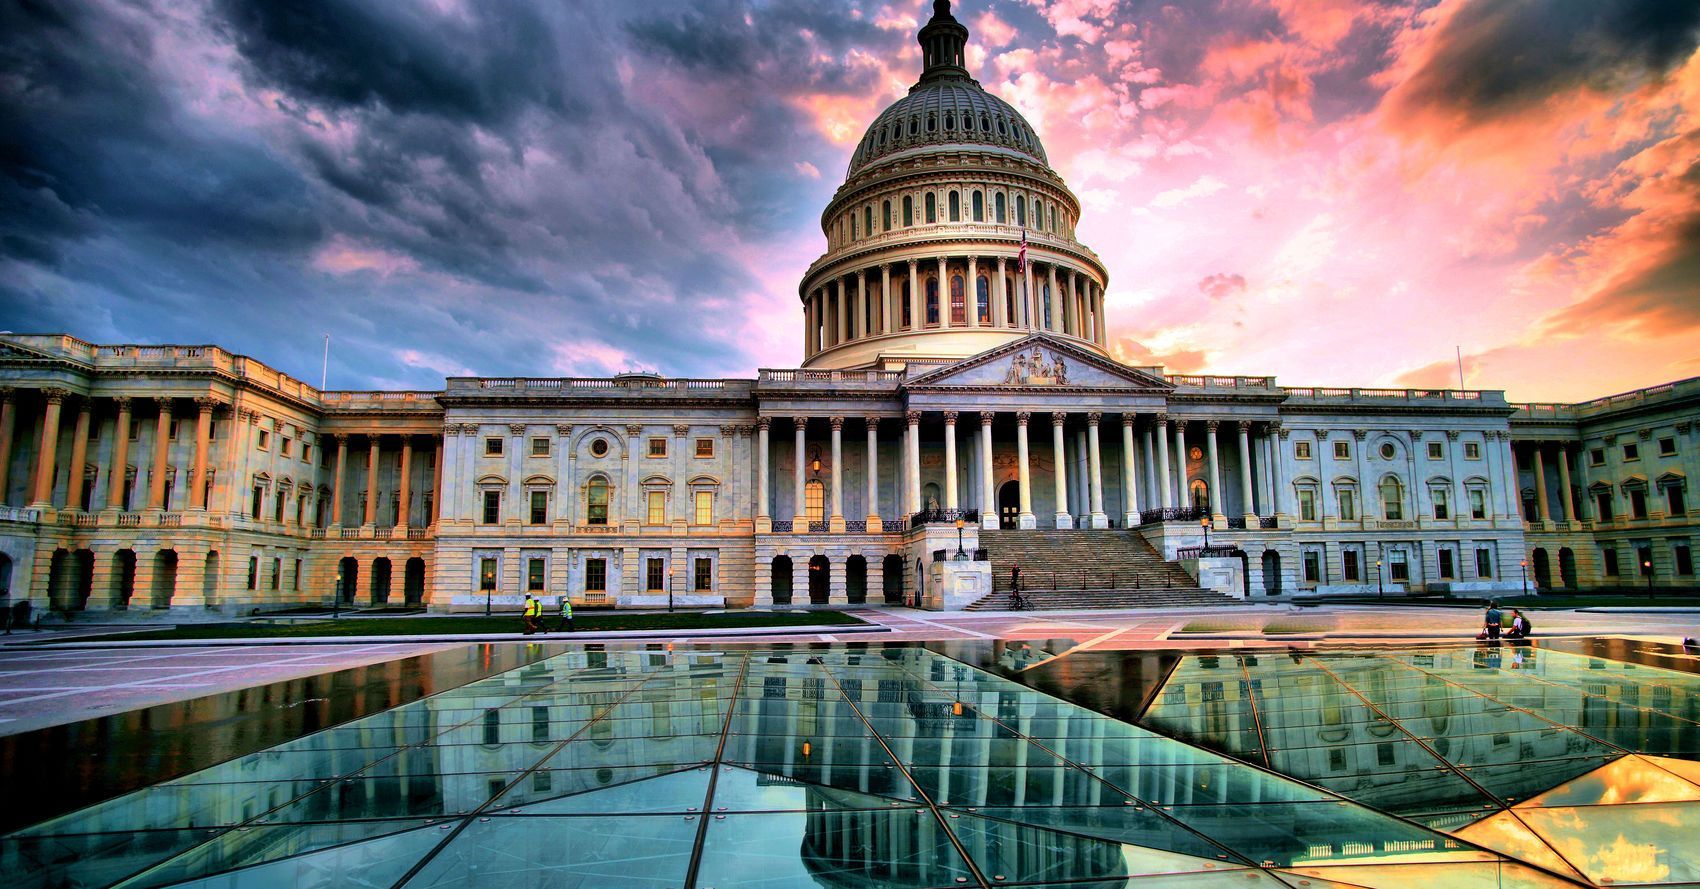
To start using HDR, you must understand when it is best suited for you. You don’t just need to know ‘What is HDR photography?’. HDR excels at highlighting details in architecture and other man-made structures, so you can use it to take pictures of such things.
In addition, HDR captures landscape images with a variety of textures, colors, and shapes, including sunrises and sunsets. It’s important not to overdo the settings or editing when taking photos of this sort.
2. How Does HDR Work?
HDR images are created by taking multiple pictures at different exposure levels and combining them in the software for optimal results. It is, of course, a more detailed procedure.
The first step is taking a set of bracketed photos. A photographer takes pictures of one subject using a variety of shutter speeds in order to get a set of pictures with a variety of luminosities.
After that, the pictures are combined together by a professional picture editing application, creating one photo with the brightest, properly illuminated, and focused areas of the scene.
3. Use a Tripod
A tripod greatly simplifies the shooting process and helps to obtain stable shots, but it is not required. Despite the fact that I shot a number of HDR pictures while holding my camera in my hands, there is no comparing them to photos shot on a tripod. Because you will be taking a series of photographs of the same scene and want them to look similar, a tripod is a good idea. Even though HDR software can usually correct picture discrepancies, it is still better to shoot correctly in the first place.
4. Shoot with Hands
In instances where a tripod is unobtainable or unavailable, bracketing (AEB) in conjunction with continuous shooting mode may be used. Typically, two-step bracketing is sufficient for high quality HDR photography results. It is best to use matrix exposure metering if possible.
When photographing HDR, minimize the use of ISO, as most programs are not very good at handling HDR noise. It is better to use Photoshop if high ISO values are necessary for some reason. With this software, you can eliminate noise in HDR photographs.
5. Set the Correct Camera Level
It is best to take care of all HDR image problems at the time of shooting rather than making unnecessary corrections later.
Some tripods have built-in levels, but if you don’t have one, you can buy a separate bubble level that attaches to the hot shoe.
6. Use a Cable Release
Using a cable release can help you avoid camera shake when you take the first shot (or each shot, if you don’t use continuous mode). Blurred pictures are common unless you use a cable release, because the camera shifts a bit when you press the shutter (Mcleod, n.d.).
7. Use a Camera with AEB
It’s important to have an Auto Exposure Bracketing (AEB) camera for HDR photography. You don’t need one, but this feature allows you to avoid adjusting camera settings after every picture. And you don’t have to manually adjust the camera settings after every picture, thanks to this function.
The subject will remain in position during the entire shooting process, resulting in quick HDR shots. I personally shoot HDR photos using the Canon EOS 5D Mark III.
8. Invest in a Good Tone Mapping Program
After you have taken bracketed photos and recorded them, you can combine them in the most efficient way. Lots of applications can handle this process, but I normally use HDR Soft’s Photomatix Pro or Nik Software’s HDR Efex Pro. You can find free options to this program, but they usually do not provide good tone mapping results. In fact, tone mapping is based on a particular formula. Consequently, if the program’s algorithm is correct, a spectacular result is guaranteed.
9. Use a Low ISO Setting

You should choose a low ISO value if you want to avoid seeing a lot of noise in the final picture. Look at any HDR photography example and you will see a great amount of noise and grain. You may remove noise using picture post-production software, but I still suggest lowering the ISO first.
10. Take Multiple Brackets

By using brackets, you are able to make a broader range of choices when post-processing an image. Combining nine exposures to make a picture will result in a higher-quality picture than using only three. Premium DSLR cameras allow you to take three, five, seven, or nine exposures.
If you take photos of the same scene rather than snapping from various angles, you’ll save memory on your camera. Take extra memory cards with you to the shoot if you’re concerned that your camera won’t have enough memory to store all your HDR photos.
11. Shoot in Continuous Mode

Most Nikon and Canon DSLRs provide continuous shooting capabilities. After you press the release, you can take all of the bracketed photos continuously. You don’t have to press the release for every photo you take; the continuous mode ensures that the camera won’t shake and therefore will result in crisp HDR photos.
12. Shoot in Aperture Priority Mode

Using aperture priority mode (A mode on Nikon and AV on Canon), the camera maintains the same aperture for each shot, creating the same depth of field. Because program and manual modes do not maintain a consistent aperture, they may negatively impact your HDR photography.
13. Set Up Focusing
An unfortunate side-effect of taking bracketed photos is that the camera may repeatedly attempt to focus. Because of this, the image may be slightly out of focus, which could lead to serious mistakes. How can you prevent this from occurring?
If your camera has an AF/AE-Lock button (the button to the right of the viewfinder or eyepiece on Nikon cameras), you can lock both the exposure and focus at the same time. After you’ve locked both the exposure and focus in the same way, press the button down and the shutter at the same time to begin shooting.
14. Shoot in RAW
Shoot in RAW format if you have a large memory card. JPGs are heavily compressed to reduce their size, which can result in significant detail loss. RAW files produce the best possible quality but take a long time to process and write to memory cards.
You can use a fast class 6 or class 10 SD card to store RAW pictures on your camera after shooting. Shooting in RAW and processing the picture afterwards will produce the result seen on the right. If the picture were shot in JPEG format, the final result would be the same as the one on the left.
15. Using HDR in Indoor Photography
Shooting indoors can be quite challenging for all photographers, unless you have professional equipment on hand. You’ll have to make do with the available lighting unless you have a bright view outside or uneven indoor lighting. This technique is best for real estate photographers.
16. Take HDR Photos at Night
When shooting a night cityscape, you can use HDR photography to emphasize the architecture and bright neon lights by making the scene dark with a few specks of light here and there.
You can also use this technique outside of the city to emphasize the clouds and landscape against the dark sky.
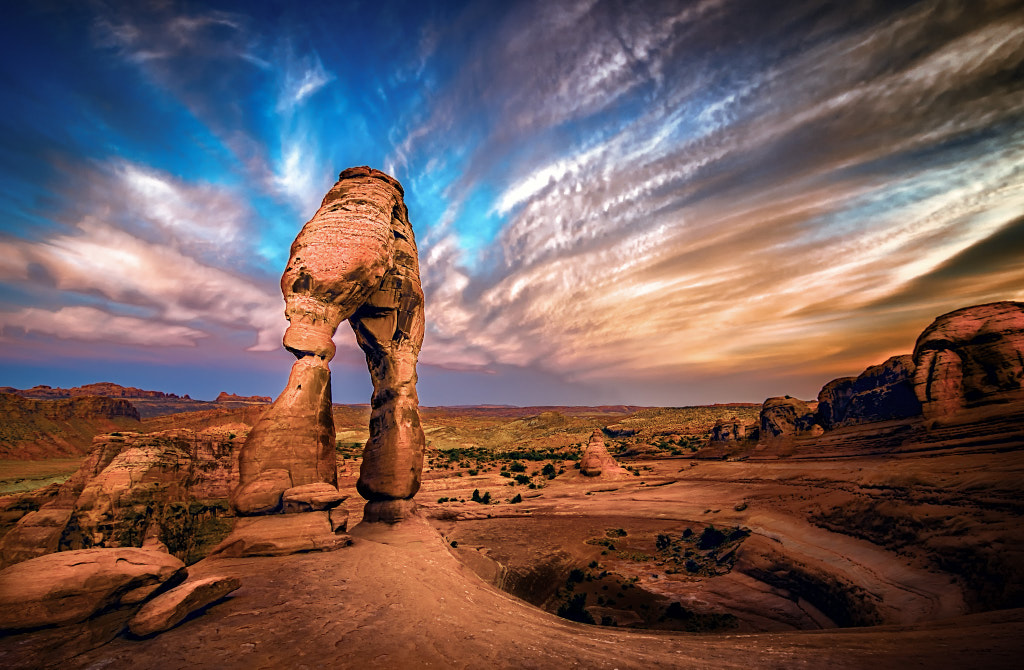
17. Shoot Different Weather and Sunsets

You can photograph landscapes in a variety of weather conditions rather than just at golden or blue hours. Shooting landscapes in different weather conditions may be a challenge, but you will end up with intriguing and creative shots. It is not always the bad weather; an overcast stormy day may appear dramatic, emphasizing the contrast between the foreground and the sky, especially when photographed using the high dynamic range photography technique.
18. Use HDR Photography for Landscapes

It is the most traditional case of employing HDR to shoot landscapes in bright light slightly elevated from the horizon, with darker ground. Photographers frequently employ HDR in various fields. By doing so, you can emphasize clouds and other elements of the landscape that are usually unnoticed.
19. Take HDR Images with iOS Devices

The majority of iOS devices have three HDR picture modes. First, the “On” setting takes three photos and then merges them into a single HDR image. The third setting is the “Auto” mode, which activates the HDR feature only when taking a picture with a high contrast ratio. The “Off” setting, obviously, disables the HDR feature. If you use iOS 11 or later, you will only see the “Auto” and “Off” settings. To save both HDR photos and standard-exposed pics, activate the “Keep Normal Photo” function.
20. Shoot HDR Images with Android

Even though it may be hard to provide a one-size-fits-all strategy for taking HDR photos with your Android device, it’s possible. Every manufacturer might have a slightly different method. It all depends on your camera’s HDR mode (often referred to as “Rich Tone” mode). HDR pictures can be taken with your Android device, but it will be more difficult.