how to take photos for virtual staging
Virtual staging is one of the latest trends in real estate, and it’s here to stay. Why? Because it gives home buyers a more realistic idea of what they can expect from an unfinished property, it certainly is an effective way to demonstrate any property’s full potential in any location–and you can do it in 24 hours for a tiny fraction of the price of traditional staging. Virtual staging is also a great way to market properties that aren’t ready to be put on the market yet. It allows brokers to list un-updated properties with limited photos on their websites almost instantly. They don’t need to spend days uploading pictures and writing descriptions – they can simply upload the virtual tour with its embedded video and images, which automatically appear online once connected to the broker’s website. This blog post will help you create awesome photos for virtual staging that will impress your clients and potential customers.
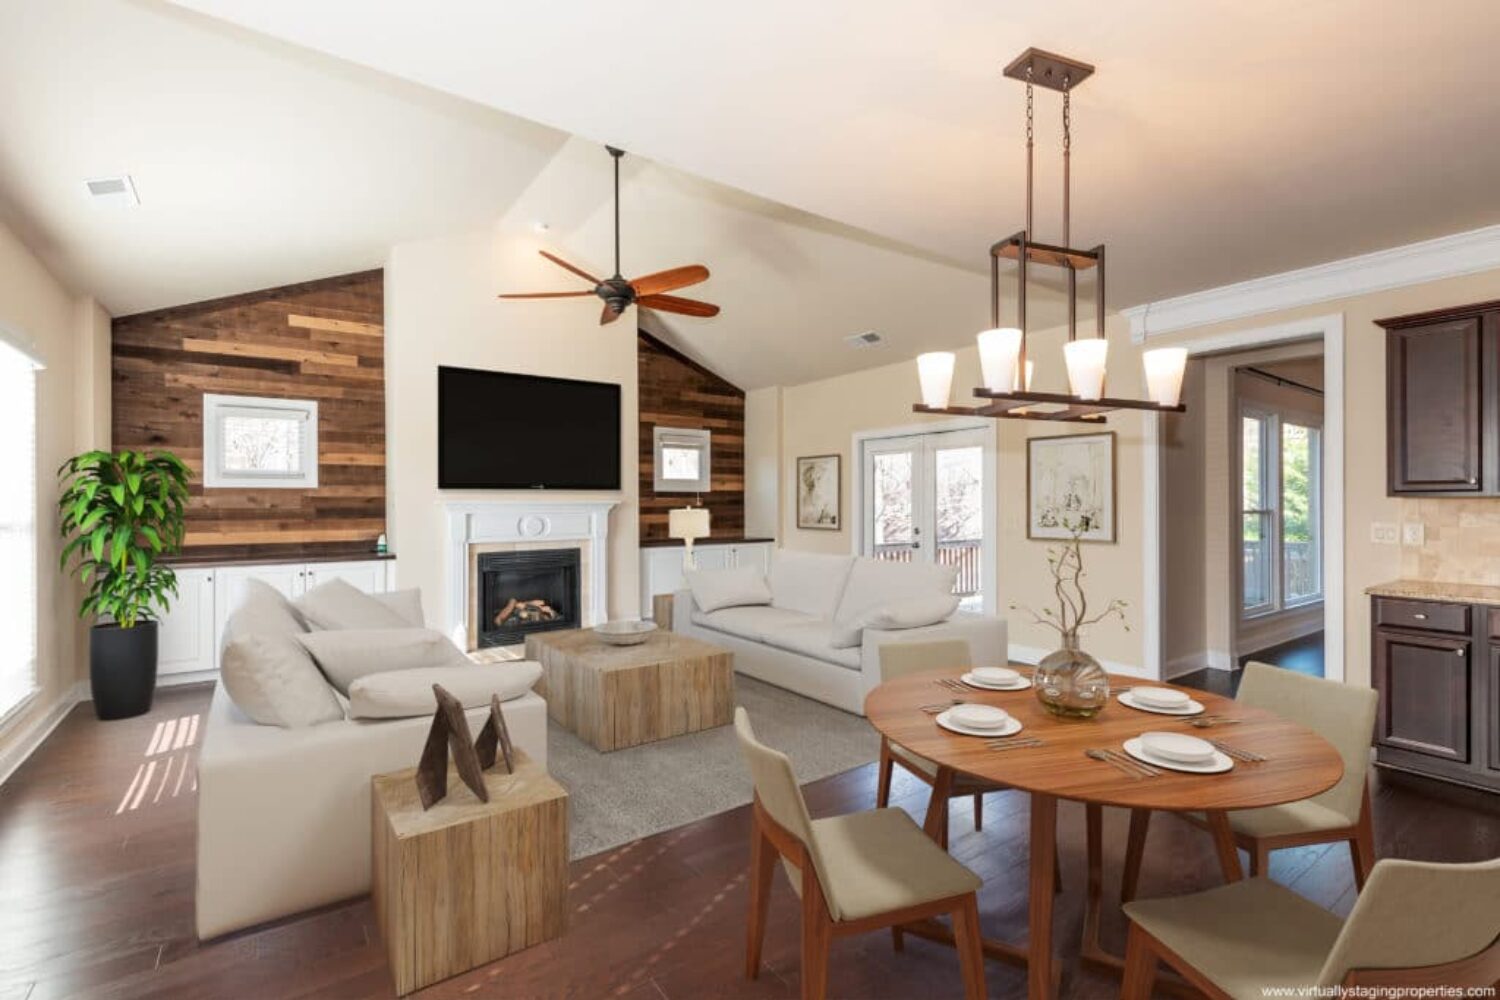
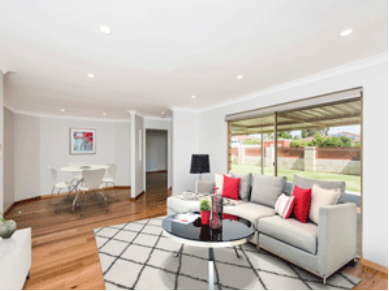
(example of real estate photography, before & after virtual staging)
Check out our Virtual Staging services here
1. Take Top-Quality HDR Photos
The highest-quality real estate pictures are required to make sure that virtual furniture looks real. Virtual staging furniture is meticulously created to resemble real furniture, decorations, and home appliances. Since virtual furniture appears so real, you must take high-quality photos to ensure your photos aren’t fake. Digital SLR cameras and RAW image format are the best for virtual staging as they provide the greatest chance of creating realistic-looking pictures.
Camera quality will make a difference in your real estate listing photos. Ideally, you should use a DSLR camera with a professional quality wide angle lens (18-22mm). When taking the pictures, mount your camera on a tripod at waist level and don’t touch the zoom button. Don’t turn the camera vertically or upside-down when taking photos and make sure tp use the camera’s lever to ensure you’re shooting horizontally.
Checklist
- Use a DSLR camera with a professional quality wide angle lens (typically 18-22mm)
- Do not use an extra-wide angle lens (like a fisheye lens)
- Stabilize the camera with a tripod
- Take all photos from waist level
- Use your camera’s HDR (high dynamic range) functionality, which will reduce over- and under-exposed photos
- Do not use your camera’s zoom functionality
- Shoot in horizontal landscape mode and do not tilt the camera up or down
- Save photos in a high-quality JPG format (at least 2,000 pixels wide)
2. Keep the Stage Empty
The first step to producing a high-quality virtual staging photo is to prepare the physical space, beginning with removing as much as possible. Although virtual staging companies can eliminate existing furniture and décor, you might as well simplify the procedure when possible. You should simplify it as much as possible. Starting with the physical space, eliminate as much as possible. Ensure all surfaces are cleaned and dirt-free, such as counters, cabinets, windows, floors, and walls. Make sure toilet lids are down and cabinet doors are shut completely. Make sure all lights are functioning and have the same color temperature before taking the photo. Turn off all fans before taking the picture. During this time, ensure that all lights work and have the same color temperature.
Checklist
- All items should be removed from the virtual photos unless you want them included.
- All surfaces need to be cleaned ( counters, floors, windows, and walls).
- All lightbulbs must be functioning.
- Make sure all the light bulbs are the same color temperature.
- Please be sure to put down the toilet lids.
- Close all cabinets or drawers
- Turn off all fans
3. Composing the Photograph
(Read our real estate photography guide here)
Virtual home staging requires you to be very intentional about each image’s composition which essentially comes down to the positioning of each photo. It’s important to plan the best time of day to photograph each room so that the east-facing rooms are photographed in the morning and the west-facing rooms are photographed in the evening. Make sure to note whether a room has a good view, a bad view, or natural lighting or unnatural lighting as you look out the windows. Open the curtains and blinds before you take a photo in a room with a view or good natural lighting. Take photos from opposite corners in each room to ensure that the image is square. Look for reflected areas as well as the focal point of the room.
Shoot in Landscape
Make sure that when you shoot, the spaces are shot in landscape, not portrait. A landscape-oriented photo is wider than it is tall. Real estate photography enables graphic designers to make the most of the available space by displaying a lot of area in landscape-oriented photos.
Checklist
- Do not stand where furniture goes
- If there is a fireplace, do not cut the fireplace off
- For kitchens, take photos slightly above the counter
- For bathrooms, take photos slightly above the counter and below the mirror
- For bedrooms, photograph the wall where the bed’s headboard will go
- Check which direction each window faces
- Plan the best time of day to take photos in each room
- Note any rooms with a good view
- Note spaces with too much/too little natural lighting
- Determine the focal point of each room
- Take photos from opposite corners
Example 1: Bad Photos for Virtual Staging
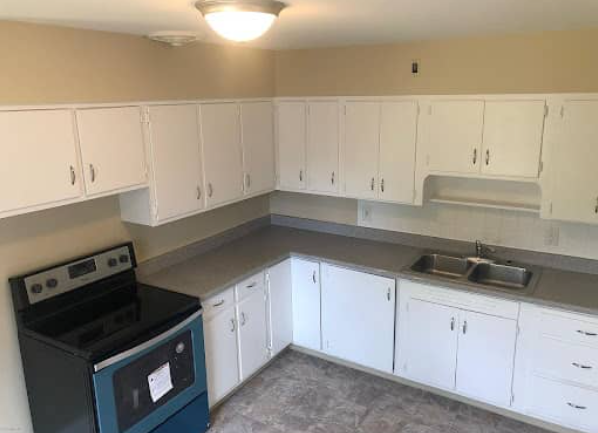
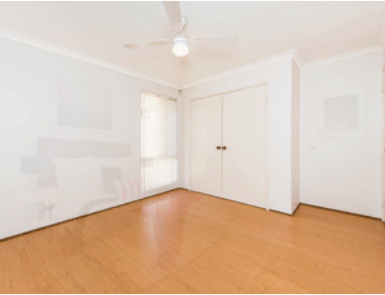
The photograph is less than ideal due to its perspective. The camera was positioned too high and pointed downward, reducing the room’s perceived size. The photograph shows little floor space, making it difficult to add virtual staging furniture.
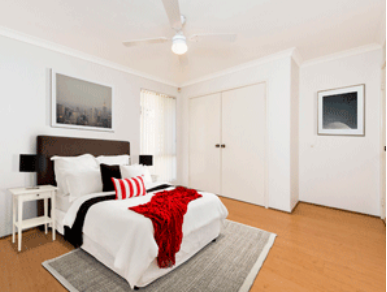
The picture of this bedroom is nearly identical to the first example in terms of the lack of floor space. Furthermore, the photograph does not show the entire wall where the bed’s headboard would be positioned. As a consequence, the room looks extremely small and does not have enough virtual staging space.
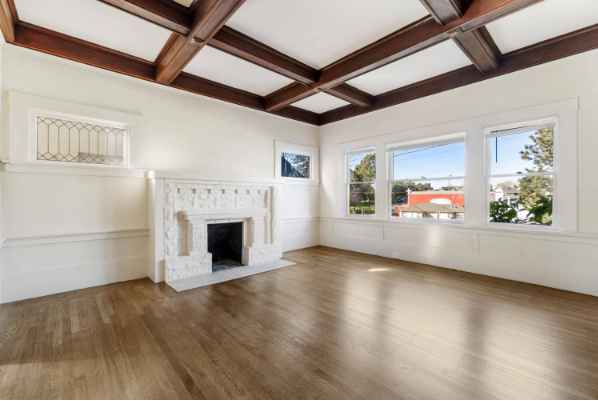
The photo demonstrates two rooms rather than one room’s focal point, which is the main issue. Floor space and lighting are fine here, but there is no focal point. It would be much more advantageous to have two separate photos that each focus on a different room. Virtual staging can make each room look better by adding a dining room table, chairs, sofas, and décor with two head-on photos.
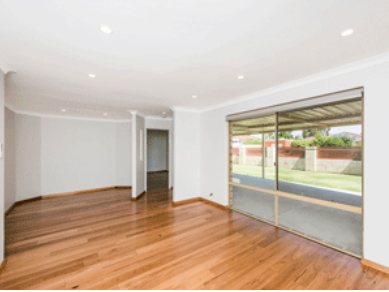
Example #2: Good Photos for Virtual Staging
More room, less ceiling
You should provide twice as much floor and wall space as ceiling space. Remember that virtual furniture and decoration are typically placed on the floor and walls. Double-check your images to ensure that there is enough room to add virtual furniture to each one.
Shoot during the “golden hour”
Photographers covet the “golden hour,” a period of time twice daily when the sun is not as high in the sky and therefore less bright (6-9 a.m. and 4-7 p.m.).
However, be cautious of windows that face east or west. Sunlight shining through those windows may create harsh shadows or overexpose the image, washing away some of the key details.
Virtual staging is a great tool, but it can leave buyers with a bad taste in their mouth if they are not presented with complete honesty and transparency. While it is often not legally required, we strongly recommend including virtual staging photos with “before” photos.