1. Know your angles
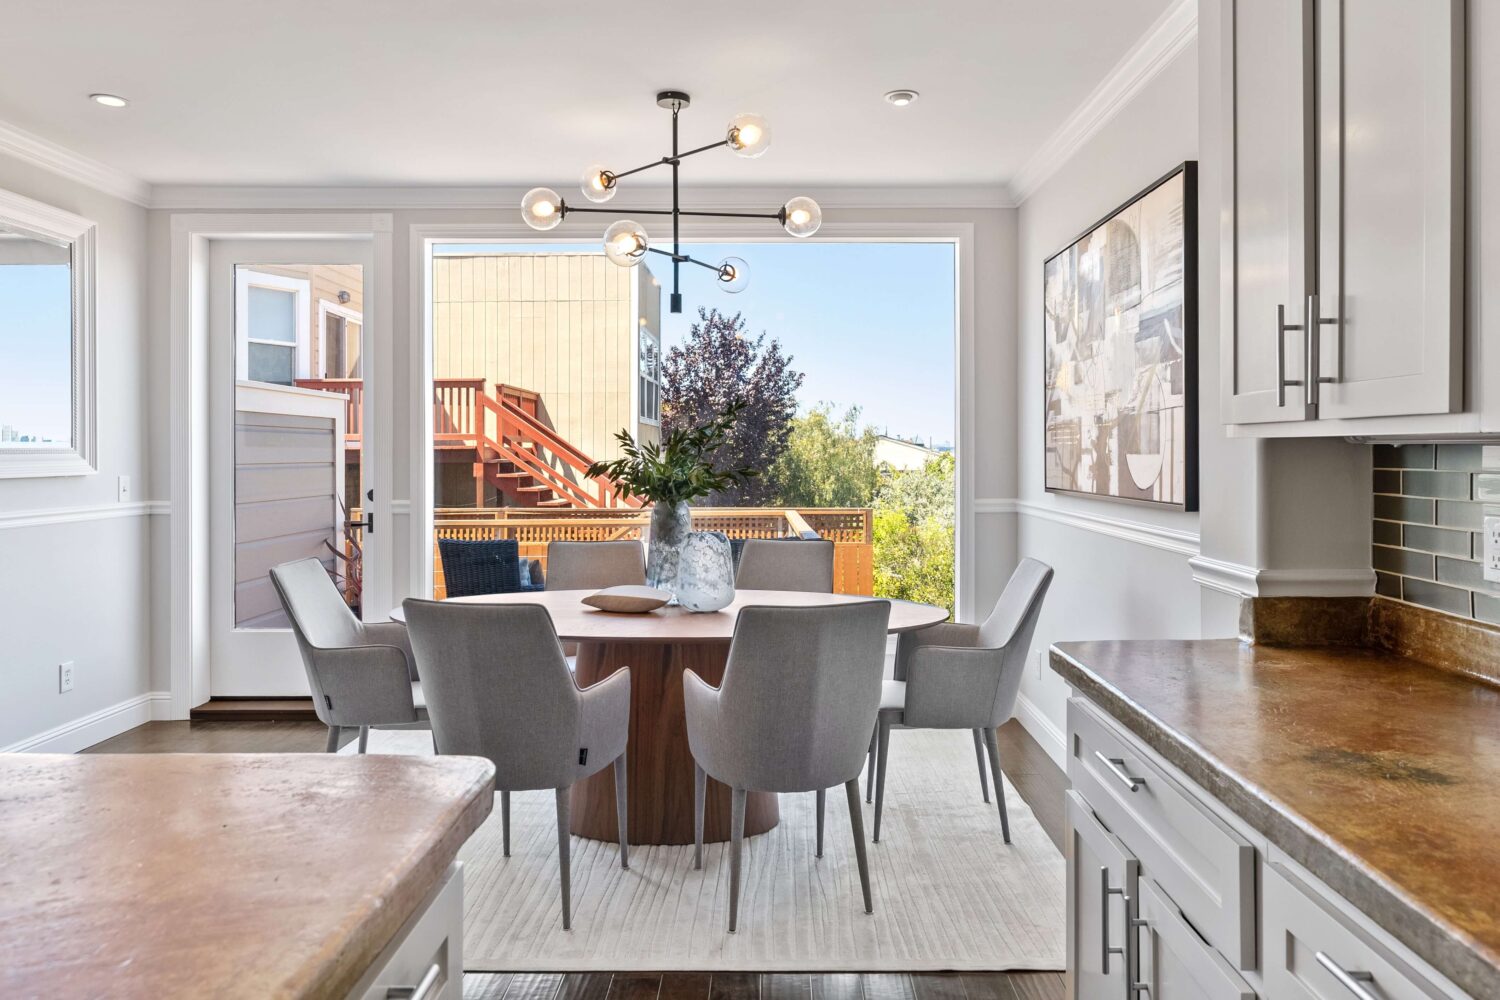
Knowing a few different angles to shoot from can help you take more compelling photos. Start by taking photos from ground level. These shots are particularly useful for outdoor photos, as they allow potential buyers to get a feel for the size of the property and its surrounding landscape. For indoor shots, try taking photos from an elevated angle above eye level. This can create an illusion of space, making rooms look larger and more open than they really are. For shots of smaller areas, like closets or bathrooms, a lower angle can provide a wider view. These angles can also help you avoid photographically problematic areas, like the dark corners of a room or dingy windows.
Use Composition Techniques
Look for Unique Angles
2. Pay special attention to lighting
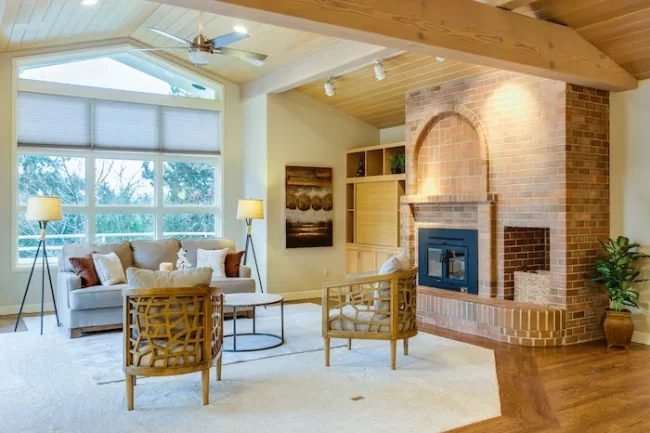
Good lighting is often the difference between a mediocre real estate photo and a stunning one. If you’re shooting during the day, try to position your home so that it’s in the shade. This will help you avoid overexposing your photos and creating a bright, washed-out look. If you’re shooting indoors, make sure you have plenty of light. You can either use natural light streaming in through windows, or you can use studio lights (if you’re taking photos after normal business hours with no natural light). If you’re using natural light, keep in mind that early morning and late afternoon are ideal times for photographing real estate. The best time to take photos is around mid-day when the sun is high in the sky. This is because the sun will naturally illuminate your home and yard without causing any harsh shadows or bright spots. You can still take photos at other times of day, but make sure to use natural light as much as possible. The sun is lower in the sky during these times of day, providing brighter and more even lighting throughout the property. It’s crucial to ensure that the lighting in all rooms is consistent, and that there aren’t varying light temperatures from shot to shot, as this can make it difficult for you to edit the photos appropriately.
Don’t use the Built-in Flash
While the built-in flash on your camera can come in handy in low-light situations, it’s best not to use it when taking real estate photos. The flash on your camera creates a harsh light that can cause shadows and make your rooms look smaller. Above all, instead of lowering your ISO, you may use a monolight or flashgun to increase the amount of light in a scene and capture clearer, brighter photos. A flash that has a built-in receiver, allowing you to fire it with a single button press, might assist compensate for low light conditions. If your flash does not have a built-in receiver, get a trigger that you can connect to the flash so that you may fire it without touching it. (check out our off-camera flash photography guide here).
3. Utilize staging
Staging is the process of strategically placing furniture, décor and other items inside a room to achieve a desired look or effect. You can use staging in real estate photography to make rooms look larger, more open and welcoming. For example, placing a couch against the far wall of a room may make the space look smaller. However, if you move it to the middle of the room, it will make the room appear more spacious. Additionally, certain items like plants and lamps can be used to highlight positive features of a property, like natural light or a beautiful view.
Virtual staging
Virtual staging for real estate photography simply means adding digital elements to a space to transform the home into a more appealing and sellable product. This can include adding furniture, decorative elements, landscaping and anything else that will help the space look more attractive. Virtual staging can be used to transform any number of spaces inside a home, including kitchens, bathrooms and bedrooms. You can also use virtual staging to transform the outside of a property, adding plants, flowers and other decorative elements to a facade to make it look as appealing as possible.
It’s important to note that this does not replace the initial photos, but rather acts as an addition. After you take the initial shots, you can use those as a guide to photoshop in the virtual elements. There are a few different tools and techniques you can use to create the perfect virtual staging photo. You can use traditional photoshopping techniques, such as cutting out and pasting elements into the shot. You can also use a virtual staging app, which allows you to add elements directly into your photos.
4. Choose the Right Camera
If you want a camera that is primarily used for architect photography, avoid devices with portrait or action photography capabilities, such as rapid continuous shooting modes or face-tracking autofocus systems. You must have a high-quality DSLR, such as the Canon 5D Mark IV or the Nikon D750. A DSLR is excellent for photographing architecture due to its high-quality image and perspective adjustment. If you want a full-frame DSLR but are on a budget, you may consider used models such as the Canon 6D Mark II and the Nikon D610.A DSLR camera is great for real estate photography, particularly if you want to shoot manually and see your images immediately. You can also manipulate your photos more after taking them with a DSLR camera. A DSLR camera gives you more options when editing your real estate photos. A wide-angle lens is a must-have accessory for real estate photography. You can take excellent pictures of small spaces with wide-angle lenses like a small room. You can also give the impression of a larger room, which is particularly beneficial for real estate photography.
5. Set Correct Camera Settings
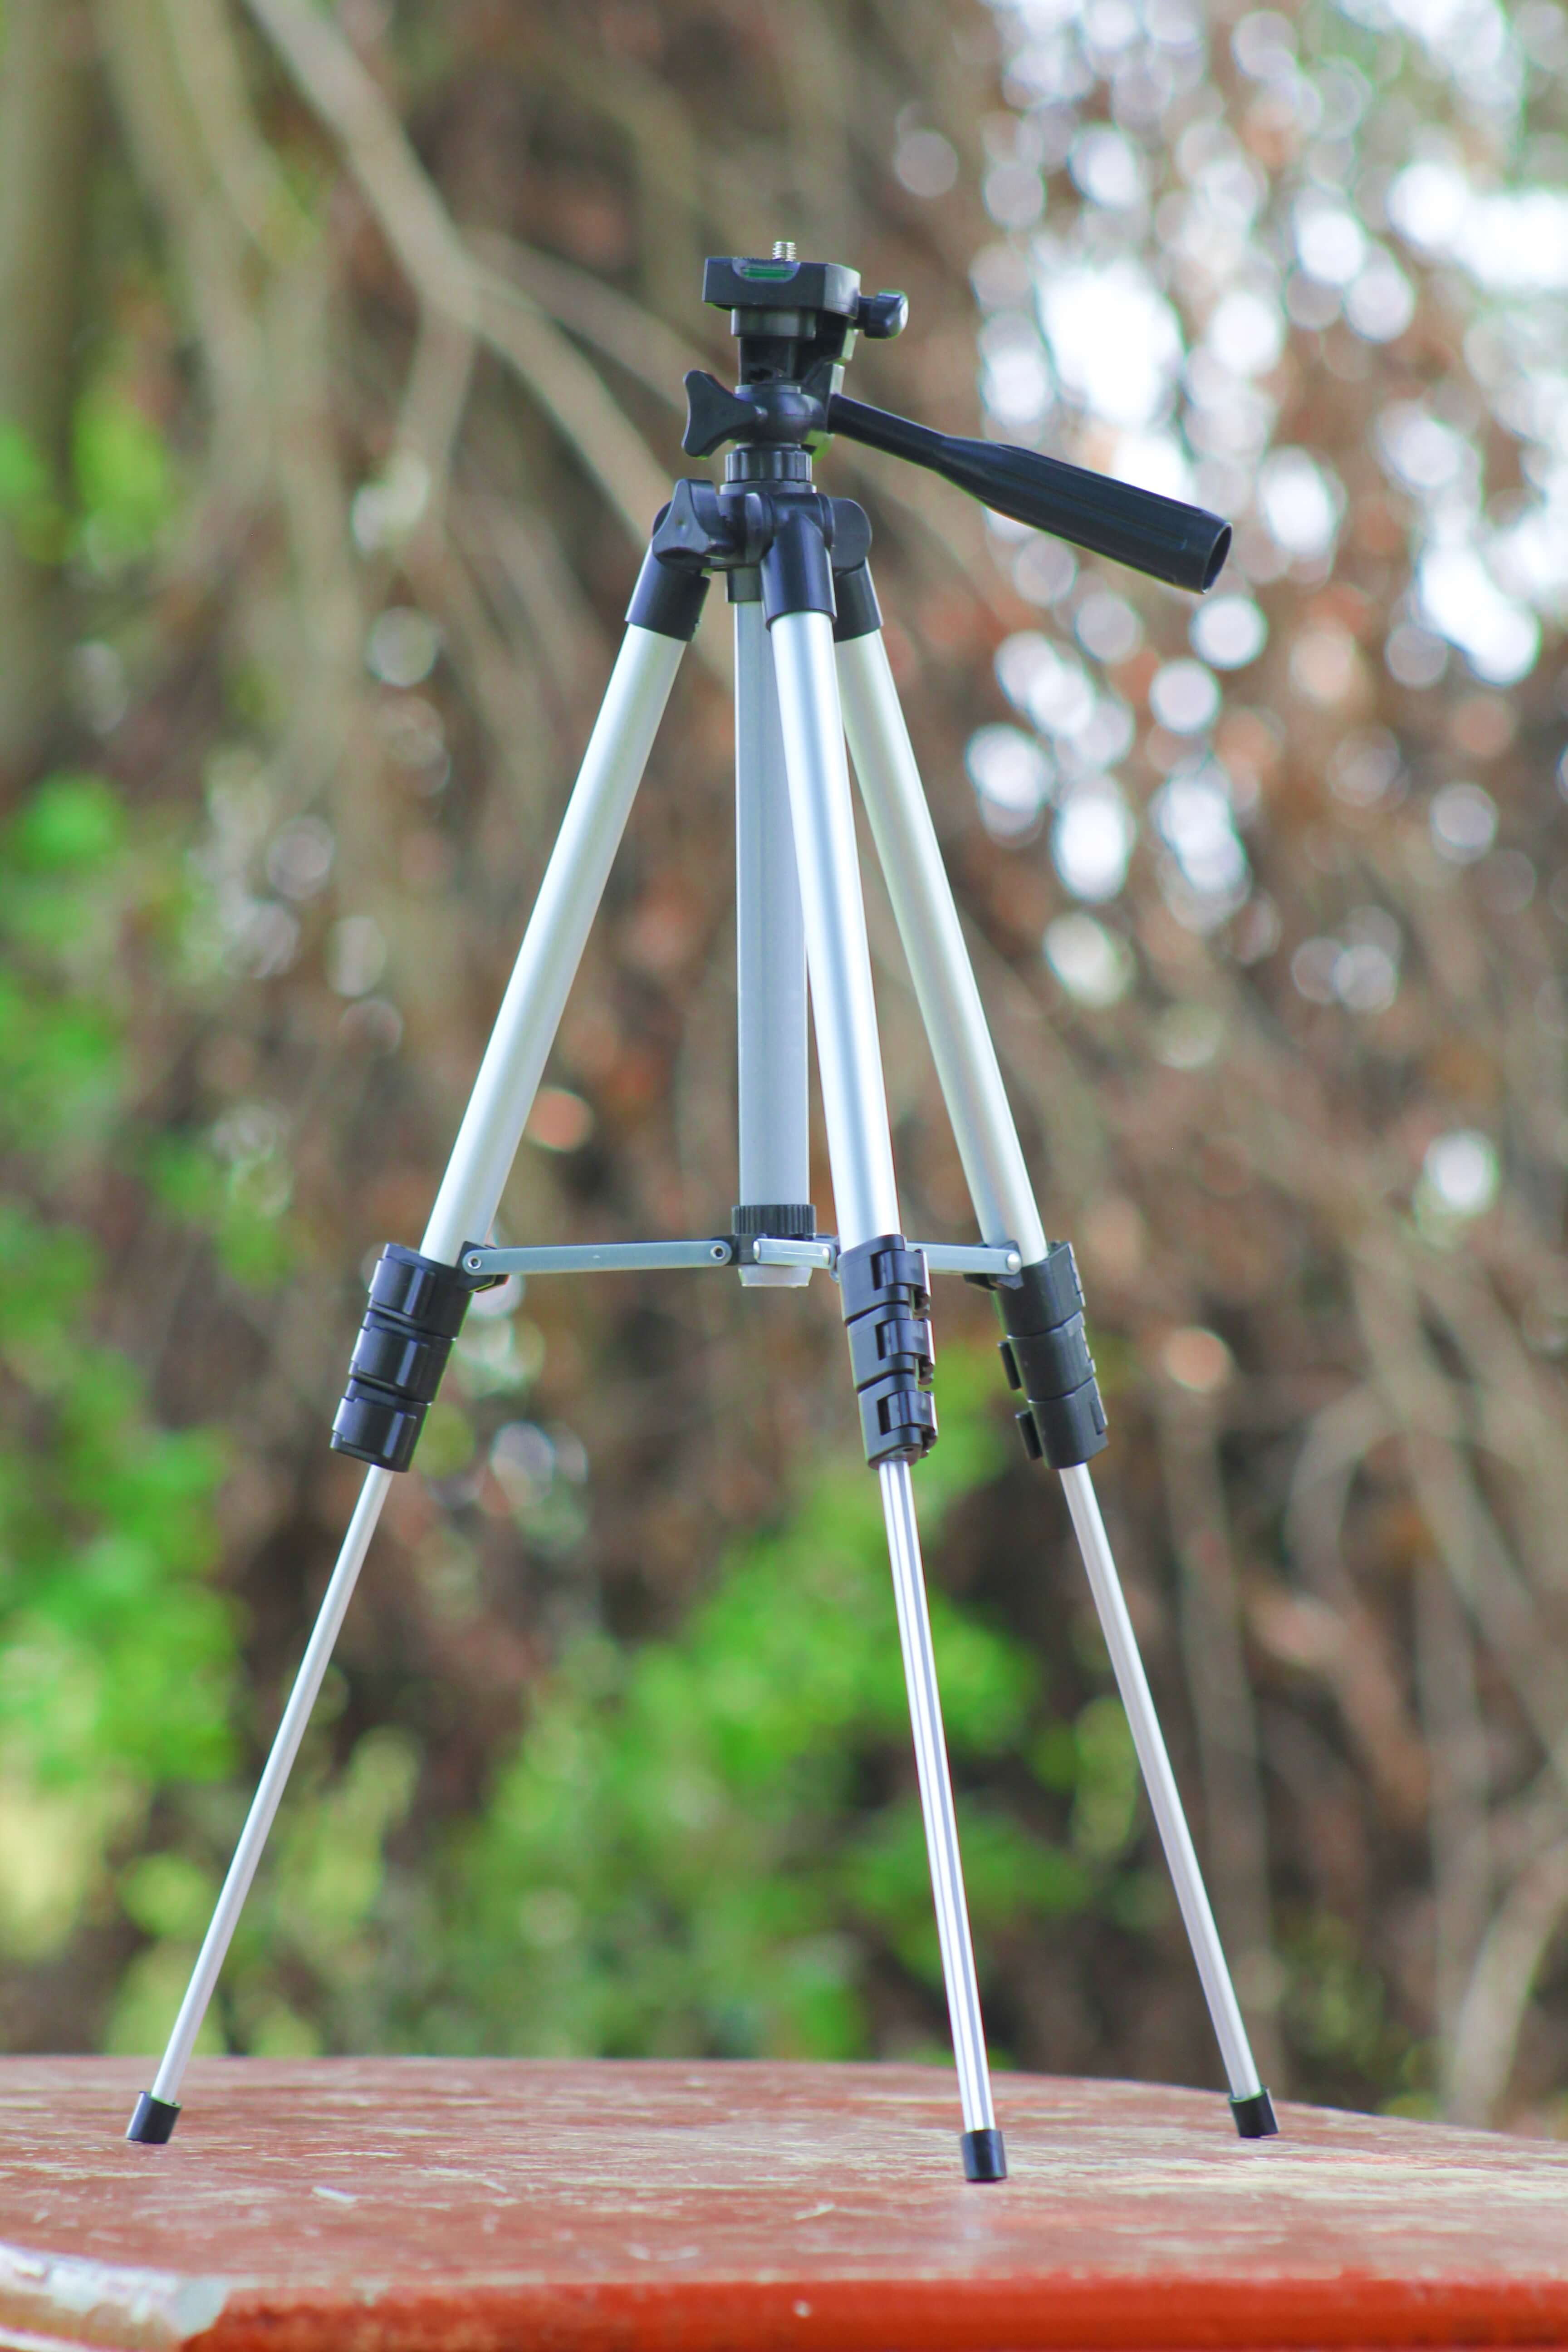
6. Use a Tripod
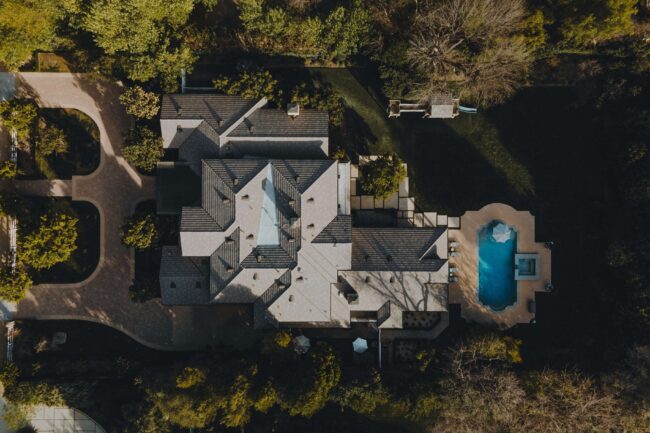
7. Get a Drone for Aerial Images
8. Post-Processing is Vital, Always Edit Your Photos!
One of the downsides of using a wide-angle lens for real estate photography is that it can create some distortion in your photos and make certain areas in an image appear warped or slightly off. But the upside is that you can correct this issue when you edit your photos. Shoot pictures in RAW to use advanced photo editing techniques. You can fix the exposure, remove minor flaws, and other things by uploading RAW photos to your device and enhancing them with Adobe Photoshop or Lightroom. You can accomplish color corrections, white balance adjustments, contrast and saturation adjustments when editing pictures of architecture. Using the editing software’s lens correction feature, you can easily compensate for issues like distortion. You can also correct any issues with inconsistent light temperature in your photos, such as one room that has hot lighting or yellow hues that are unappealing. This can be fixed using the brush feature. You can also remove undesirable objects, swap the sky or background, and fix lens distortion (check out our list of the best photo editing apps here).Ensure all of your real estate photographs have adequate lighting so that they appear professional.